Adobe Premiere:
Adobe Premiere Pro is a timeline-based video editing software which part of the film based creative hub for students, teachers, people who are in the business of editing and even first-timers who like to experiment with editing software. It is part of the Adobe Creative Suite a suite of graphic designers, video editors and web development programmers. Premiere Pro is used worldwide major well-established broadcasters such as the BBC, ITV and Channel 5. It has and still is used as editing software for feature films, such as The Social Network, The Lawrence Welk show and Monsters. Premiere is used worldwide throughout the business of media and is well established by professionals. There are a wide variety of techniques and uses for using the software for adobe Premiere, a few examples of the uses could be for music videos, to create a short film or to create a feature film.
As a beginner it may get complicated to get your head around but the more Premiere is used, the more you could get familiarised and the easier the editing gets.
The First Few Steps:
Opening the Software, Usually Premiere would be on your desktop labelled Pr, if the software isn’t visible on the desktop try opening in via Finder.
Once you have identified Premiere, click on it and wait a few moments for the programme to load. A window should pop up offering you to create a new project, open a project or a help option will appear. As premiere loads a window will appear on your screen offering you options as to where you would like to save your work and also settings you would like your project to look. Premiere will offer you the standard settings in how you would like your video settings to turn out.

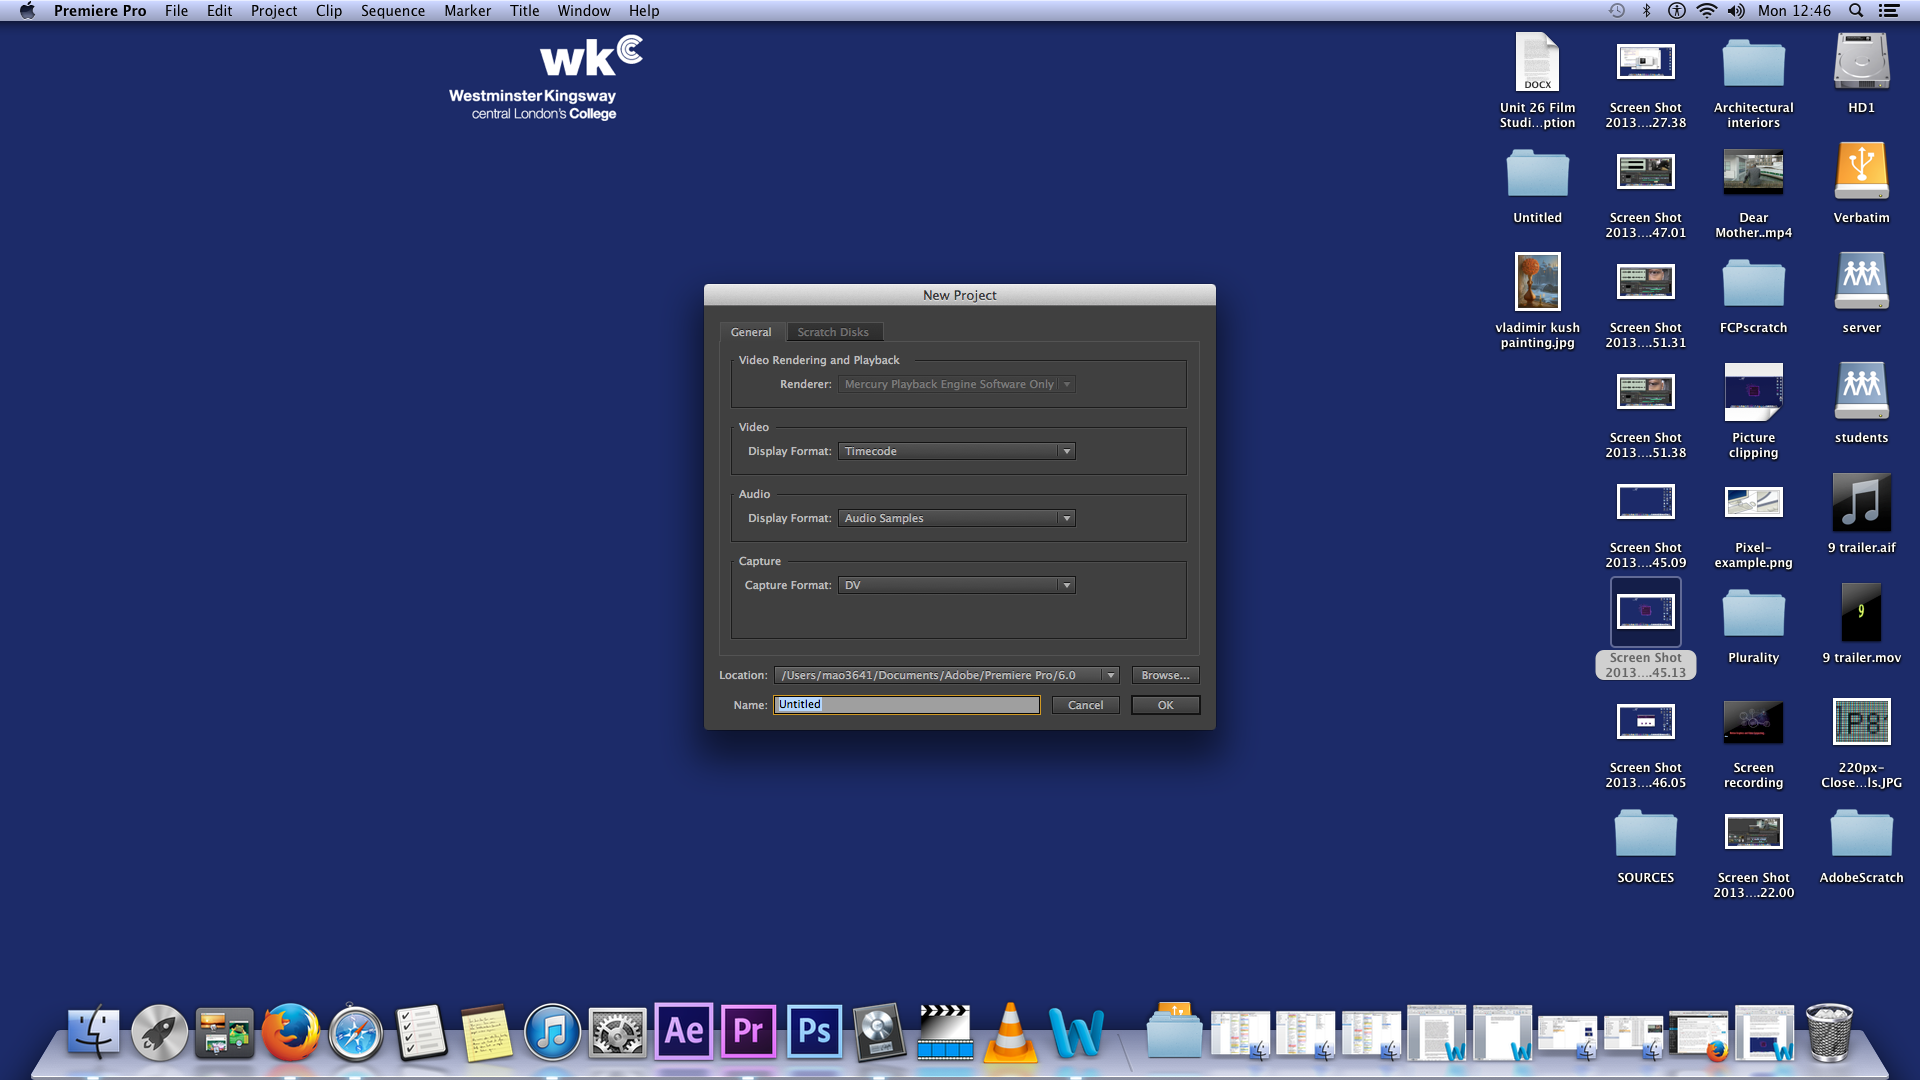
There is a vast field in settings to choose from, HD to 1080(pixels) to movie files (MOV). Choosing the correct options is dependent on how your composition may turn out, you could always change it at a later time if you are unsure of what to choose. I would usually choose HDV 1080p 25 meaning the frame rate is 25 frames per second and there are 1080 pixels on screen. Audio can also be chosen here.
(Bottom left:)
Premiere will first look blank but you will see a range of options to choose from once you’re set up. There will be a slot to enter your visual videos, information about your audio, history, markers, media browser and where your project clips will be, in this space you will need material to edit.

Importing:
Importing footage is the easy part, once you have footage ready to import click FILE, scroll down half way till you see the import option, choose which files you would like to import from your selected folder and proceed to import your video footage. Your footage should appear on the bottom left hand side of your screen on premiere here you have to option to choose from what footage you’d like to get started with. Also you have effects on the bottom left hand corner too! This would be useful when choosing Video and audio transitions and effects. If you already have a saved project by clicking on the media browser this allows you to select video footage from your computer.
You can also import a recent file, which means, this is a short cut to any files you have imported on Premiere to avoid wasting time. Once you have selected your footage select import, you can import multiple files at once my holding the shift key and clicking the left mouse button then clicking import.
Tools:
Side bar:
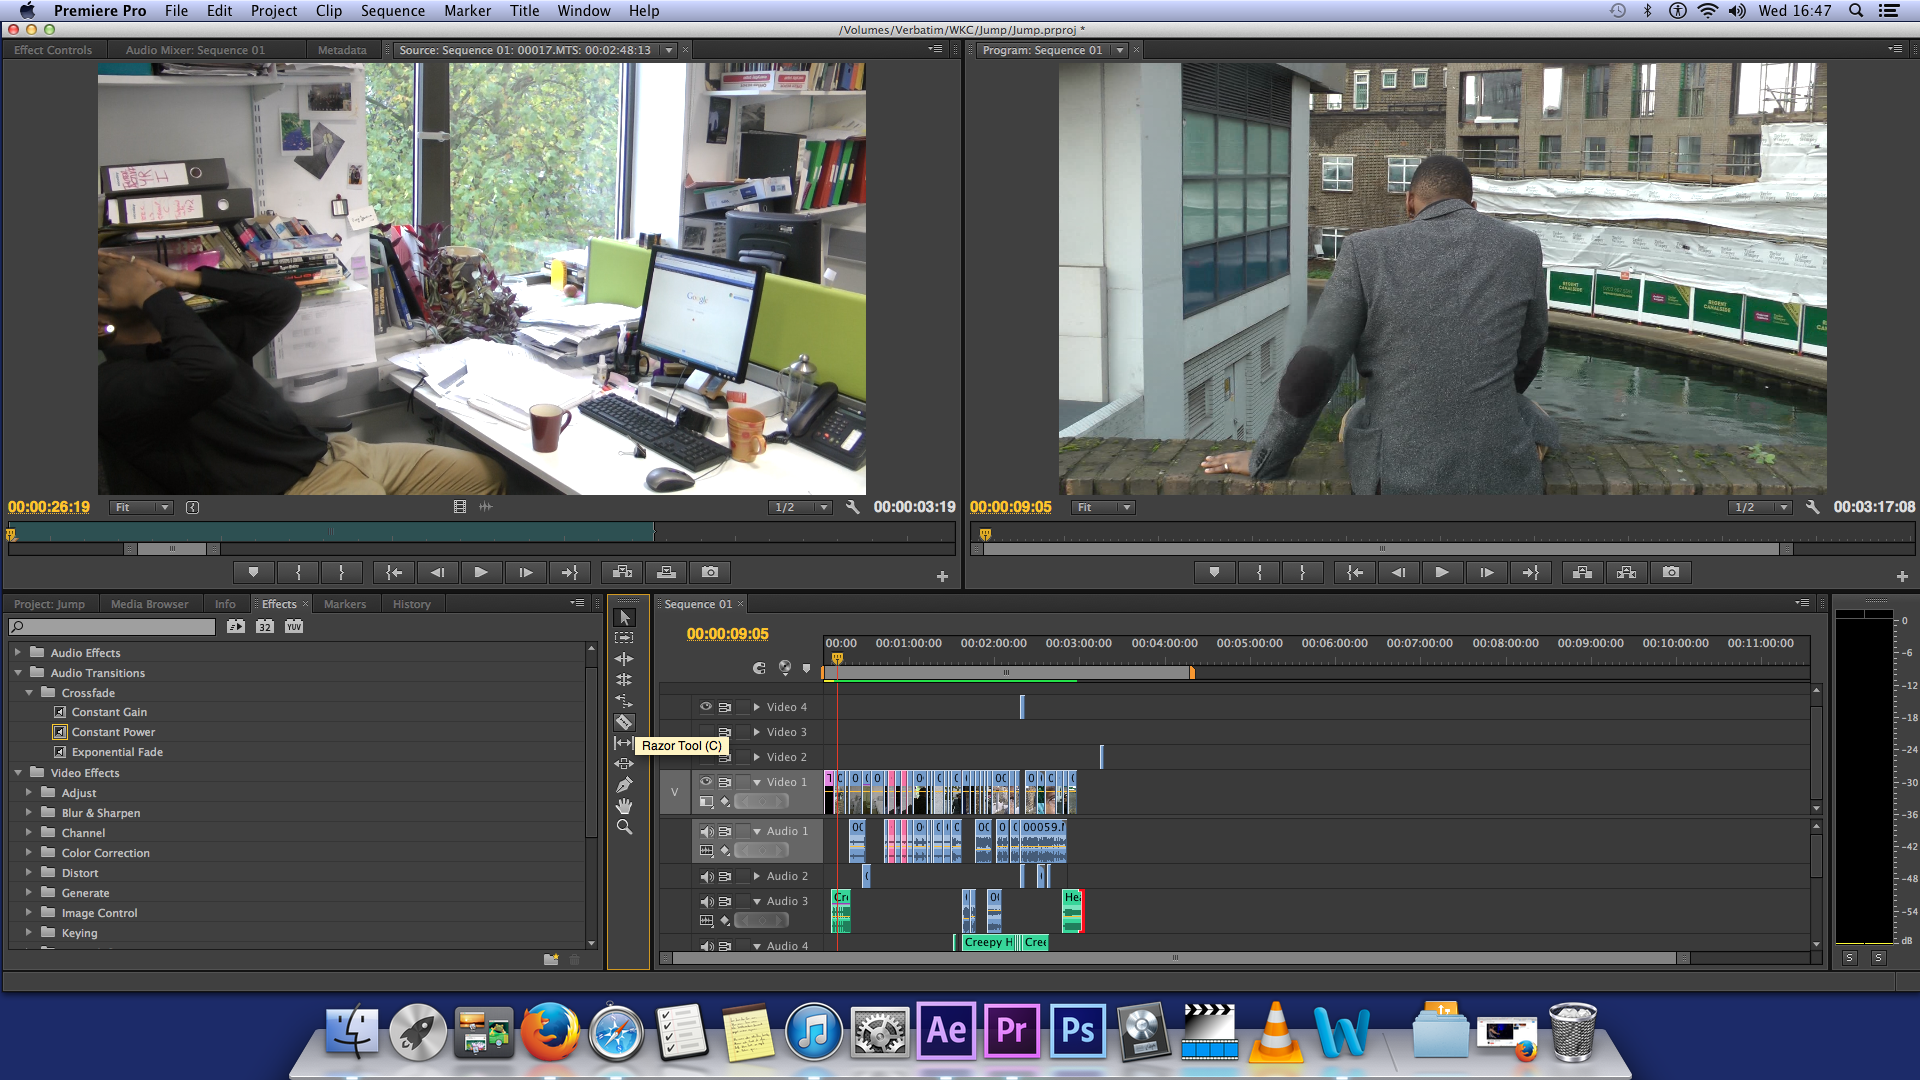
The side bar deciphers weather you’d like to hear or see what you are editing. As the eye tool on your left hand side, as the eye tool is selected the eye tool chooses weather you can enable or disable what you can view on your timeline, this can be handy when trying something new. Tools are very handy whilst editing as they would be handy to a builder whilst being on a job, the tool section are tools which aid you to create your video. The top icon is the arrow tool (select tool) which allows you to select, highlight and move items from one place to another, the 5th tool down is called the blade tool, which allows you to cut footage this could be handy for editing as this allows you to cut film as scissors would be handy to cut a film tape. The icon at the bottom is the magnifying tool, if ever you need to zoom in to footage this could be handy, works well with the razor tool. The scrolling icon at the bottom of your screen is the scrolling tool, this could also be used to zoom in or zoom across to view your footage. Shortcut letters also appear on the tools option if you hover the mouse over the icon for long enough. For example for the razor tool the description of the tool will appear and the shortcut to use it for example: Razor tool (C)
In & Out Points:
By moving your footage from the bottom left hand corner where all your clips are stored, by pressing and holding & dragging it onto the left screen, you can start to editing and using (In) and (Out) points to select a specific scene you want. This allows you choose the clips that you want to use from your videos, for example if you would like 10 seconds from a 20 second video here is where you would be able to do that, This can be used by clicking on the (In) a shortcut will be the I button. The out button, which is the second button on your left and the one next to it, on your right, is the (Out) button. This allows you to select your footage that you want to edit instead of loading the whole footage on the timeline. As shown on the left hand window.
Using Multiple Clips
Managing multiple clips may be difficult at times, as long as the footage is on the bottom left hand side your clips are safe. As you double click on the footage, on the left hand side at the top a window should appear showing footage this is your viewing window. Your viewing window allows you to view, select and mark what part of the clip you would need, for example if you have a twenty second clip on the window on your left hand side and you would only like to select five or ten seconds of that clip whilst viewing your clip select (i) to mark the point you would like your clip to start from and as your happy with the footage select (o) to mark your out point. This is very important whilst editing, it saves time and as you use it this technique steadily improves your editing skills.
Multiple clips could be put on your timeline and by using the window on your left hand side, the select tool, the razor tool and the scroll tool simultaneously whilst managing multiple videos a video could be made.
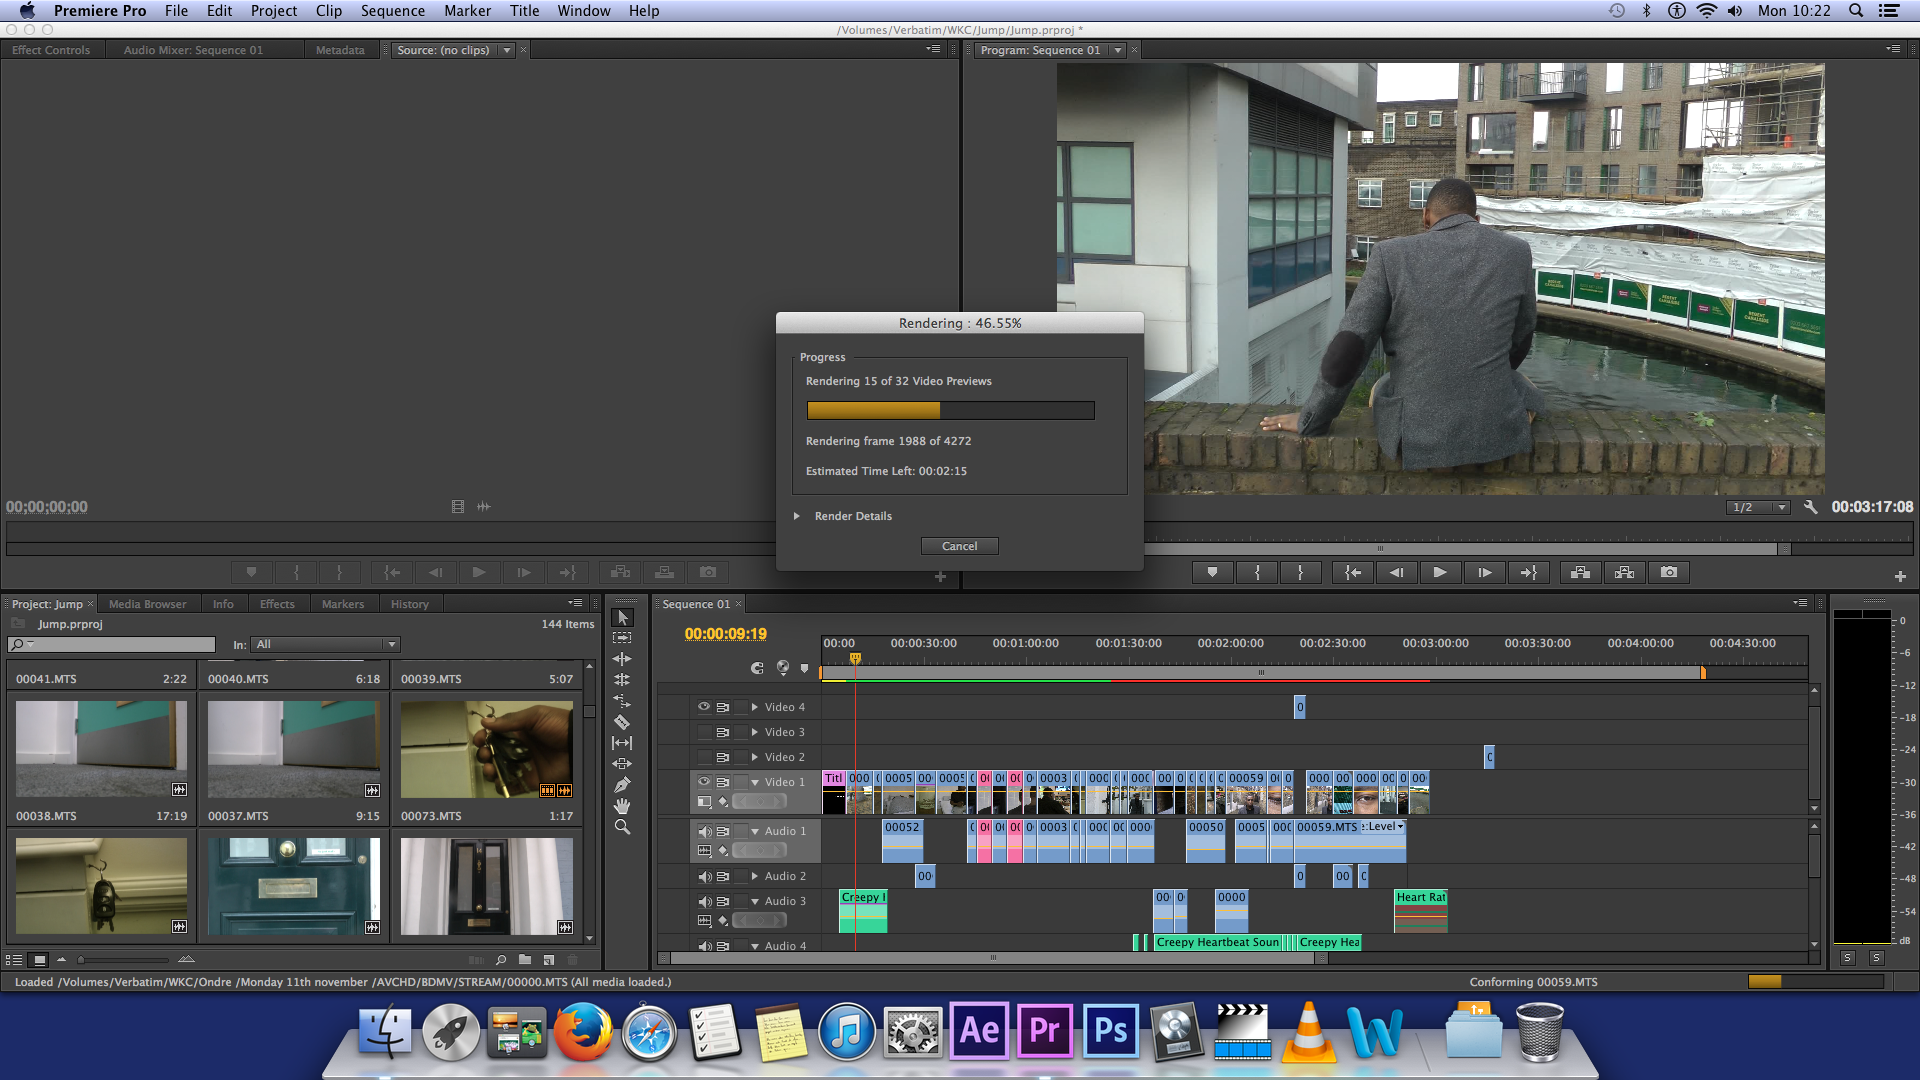
This space is your timeline, here your visual and audio files can be viewed and stored and also edited. The blue bar represents your video clips and the green bar represents the audio sound usually you would sync your audio to match your visuals. The timeline tells you how long your video lasts and is up to the editor of how long the video lasts. The red/green bar at the top represents your rendering queue, if the bar appears red the clip may need to be rendered to make playback smooth and easier to view during playback, to render click the enter key. Once the video has rendered the red bar at the top should be green.
Adding Effects:
Earlier the box on the bottom left has been explained to you but to reiterate the bottom left has a range of tabs you can select to use for your videos such as history, markers info, media browser, project title and effects. Effects can be very useful to the editor, as effects are needed throughout any film, unless you’d like your video to look basic. Here you will have a wide range of useful tools to assist you with your edit such as audio effects and transitions along with video effects and transitions. I like to play around with all of these and find the best outcome. There are a range of effects I like to play with, with audio and visual for example; Video transitions playing with fades create a really nice effect.
Once you decide the effect you want, click and hold and drag the title of the effect you would like to your desired place on your timeline, this should appear on your clip as a purple rectangle. As the selection tool highlights the purple rectangle it is up to you to choose the length and duration of your effects by dragging and extending your clip when this icon appears on screen.
Adding Audio
Adding audio is practically the same as adding video, click file import, and search for your audio file. Audio files are the same as using video files.
Rendering and exporting:
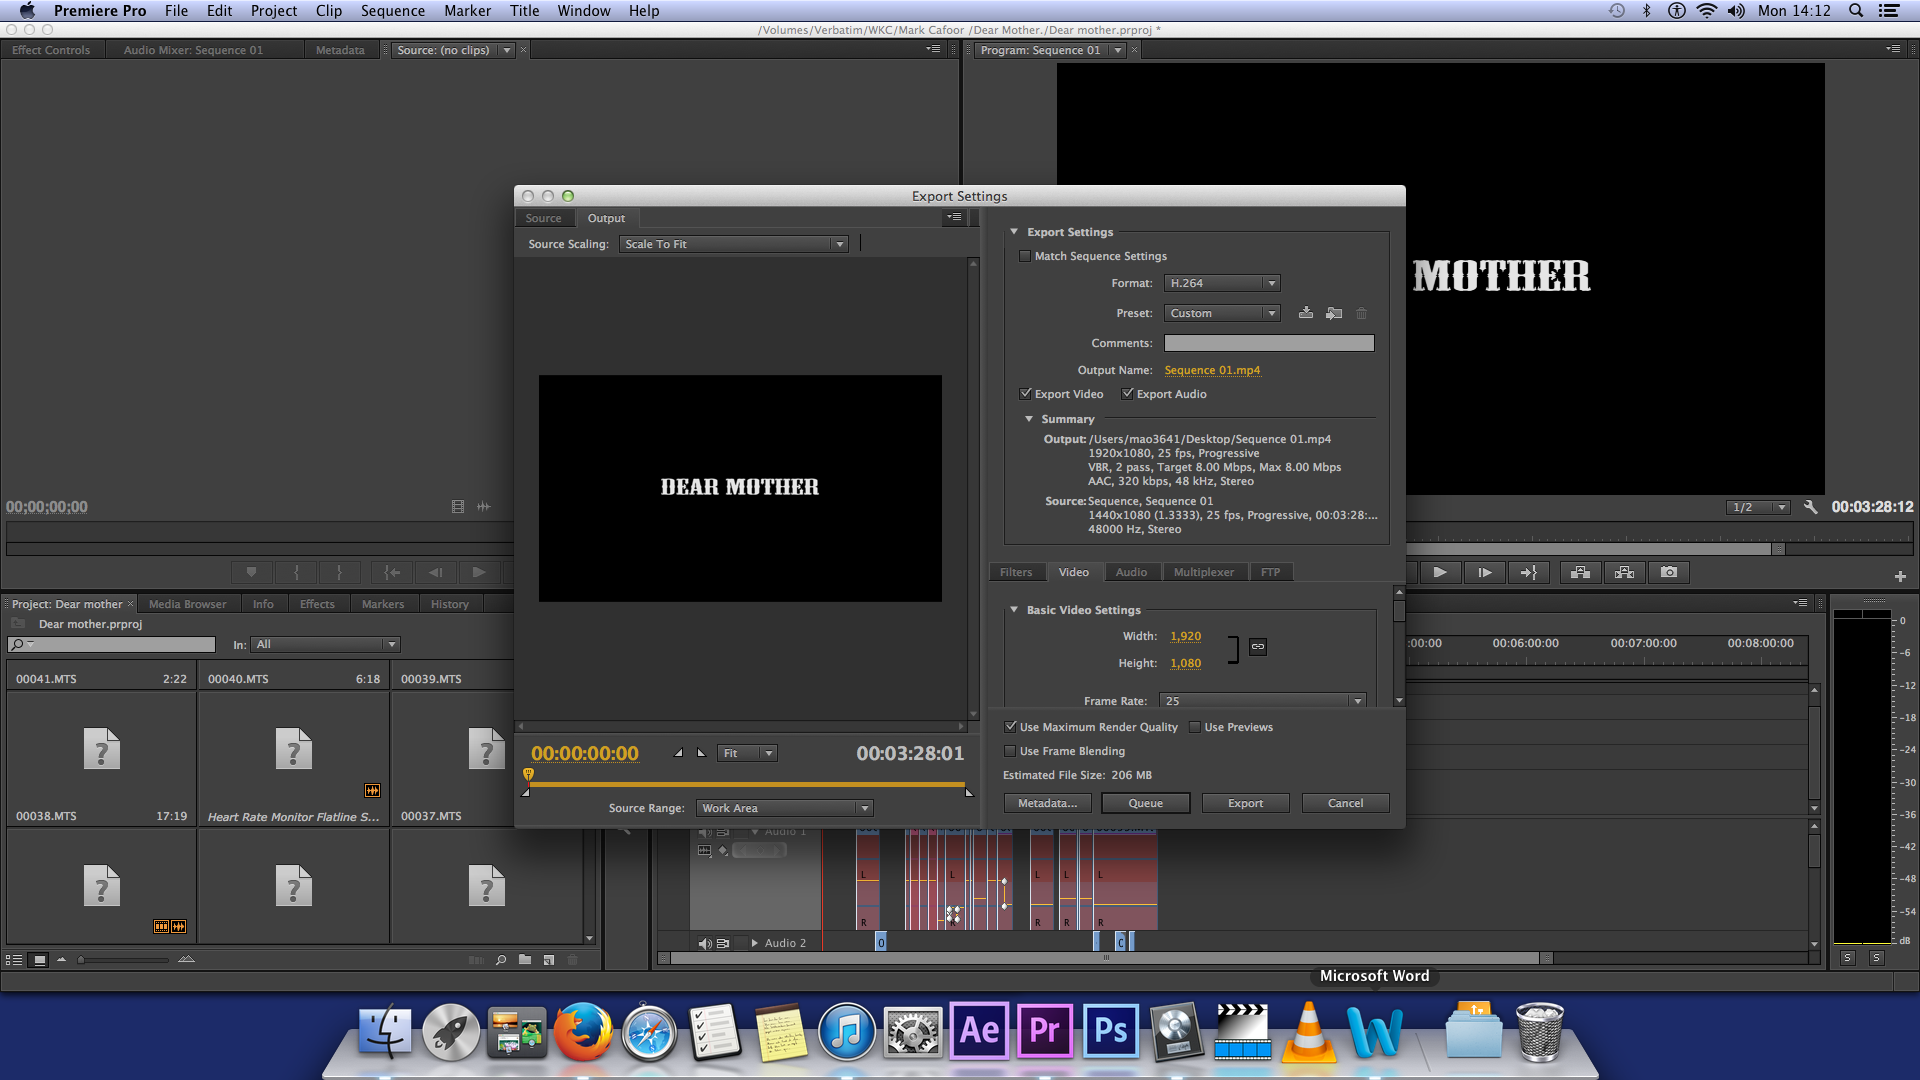
By clicking on file and export this is where your project will render and give you an option to choose what format you would like to export your film at. I usually export by clicking file, export, media and making sure the setting are on H.264 my film at Once you have used the correct setting you are allowed to preview your project which allows you to edit your project if needed. There are also options, which allow you to make changes to audio settings if needed. Once you’re ready to export, click the export button and save your files to a folder where you would be able to access your work and would remember where you have saved it.
Thank you for viewing my tutorial.
Ondre Roach.
